Air Conditioner Troubleshooting: 5 Common Issues

Common AC Issues and Their Solutions
When your air conditioner fails during a scorching Florida summer, it’s both frustrating and uncomfortable. This guide on AC troubleshooting tips addresses common air conditioner problems and how to fix them quickly:
- Thermostat Issues: Ensure the thermostat is set to "cool" and batteries are working.
- Airflow Problems: Check and replace dirty air filters.
- Electrical Issues: Inspect circuit breakers and power supply.
- Refrigerant Leaks: Look for hissing sounds or ice on refrigerant lines and call a professional.
- Outdoor Unit Maintenance: Clean the outdoor unit to remove debris and ensure efficiency.
Now that you have a quick overview, let’s dig into more details.
I'm Allen Chenault, the Owner and Founder of AC's Heating & Air LLC. With over 8 years of experience, I’ve seen and solved countless HVAC issues, always aiming for top-notch customer satisfaction. I’ll share actionable AC troubleshooting tips to help you maintain comfort in your home year-round.

AC troubleshooting tips word guide:
1. Thermostat Issues
Check Thermostat Settings
A common culprit for AC problems is the thermostat. Before jumping to conclusions, ensure your thermostat is set to "cool" mode and the temperature is set lower than the current room temperature. Sometimes, the issue can be as simple as incorrect settings.

Steps to Check Thermostat Settings:
- Set to Cool Mode: Make sure the thermostat is in "cool" mode. If it’s set to "heat" or "off," your AC won't turn on.
- Adjust Temperature: Set the thermostat to a temperature lower than the room temperature. This ensures the AC kicks in to start cooling.
Replace Thermostat Batteries
Dead batteries can also cause thermostat issues. If your thermostat display is blank or unresponsive, the batteries might be dead. Replacing them is a simple fix that can save you a lot of hassle.
Steps to Replace Thermostat Batteries:
- Remove the Thermostat Cover: Gently detach the thermostat cover to access the batteries.
- Replace the Batteries: Insert new batteries, making sure they are aligned correctly.
- Reattach the Cover: Snap the cover back into place and check if the display is working.

Pro Tip: Replace thermostat batteries at least once a year to avoid unexpected issues.
By checking and adjusting your thermostat settings and replacing dead batteries, you can often solve common AC problems without the need for a professional. However, if these steps don't resolve the issue, it might be time to call in an expert for a deeper inspection.
Next, let's discuss how to tackle airflow problems in your AC system.
2. Airflow Problems
Airflow problems are a common issue in AC systems and can significantly affect your home's comfort and energy efficiency. Poor airflow can be caused by dirty air filters, blocked vents, or issues with the ductwork. Let's look at how to address these problems.
Replace Dirty Air Filters
A dirty or clogged air filter is one of the most common reasons for poor airflow in your AC system. When the filter is clogged with dust, dirt, and debris, it restricts the airflow, making it harder for your AC to cool your home.
Steps to Replace Dirty Air Filters:
- Turn Off the AC: Always turn off your AC before inspecting the filters to avoid any accidents.
- Locate the Filter: Find the air filter in the return air duct or the air handler unit. If you're unsure, consult your AC unit's manual.
- Inspect the Filter: Remove the filter and hold it up to the light. If you can't see much light passing through, it's time to replace it.
- Replace the Filter: Insert a new filter, ensuring it fits properly and is aligned correctly.
Pro Tip: Replace your air filter every 30 to 90 days, or more frequently if you have pets or allergies. This simple step can improve airflow and extend the life of your AC system.
Ensure Vents Are Open and Unblocked
Blocked vents can severely affect airflow and system efficiency. Rugs, drapes, or furniture can easily block both return vents (which suck air in) and supply vents (which blow air out), causing uneven cooling and higher energy bills.
Steps to Ensure Vents Are Open and Unblocked:
- Walk Through Your Home: Check all the vents in your home, including those in unused rooms.
- Remove Obstructions: Ensure that rugs, drapes, or furniture are not blocking the vents. Move any objects that are in the way.
- Clean the Vents: Use a vacuum to remove dust and debris from the vent covers. This helps maintain good airflow.
Pro Tip: Keep all supply vents open, even in unused rooms. Closing vents can increase energy bills and cause other AC problems.
By replacing dirty air filters and ensuring vents are open and unblocked, you can solve many airflow problems and improve your AC's efficiency. If these steps don't resolve the issue, it might be time to inspect the ductwork or call a professional for help.
Next, let's discuss how to tackle electrical issues in your AC system.
3. Electrical Issues
Electrical problems can cause your AC to stop working altogether or run inefficiently. These issues often involve circuit breakers, power supply, and electrical connections. Let's look at some AC troubleshooting tips to tackle these problems.
Check Circuit Breakers
A tripped circuit breaker is a common reason for an AC unit not working. Heavy usage, power surges, or electrical faults can cause the breaker to trip.
Steps to Check Circuit Breakers:
- Locate the Breaker Box: Find your home's breaker box, usually in the basement, garage, or utility room.
- Identify the AC Breaker: Look for the breaker labeled "HVAC" or "AC."
- Reset the Breaker: If the breaker is in the "off" position or between "off" and "on," flip it fully to "off" and then back to "on."
Pro Tip: If the breaker trips again immediately, don't keep resetting it. This indicates a more serious electrical problem that needs professional attention.
Inspect Power Supply
Sometimes, the issue lies with the power supply to your AC unit. Loose wiring, damaged fuses, or issues in the electrical panel can disrupt the power flow.
Steps to Inspect Power Supply:
- Turn Off Power: Always turn off the power at the breaker box before inspecting any electrical components.
- Check for Loose Wires: Open the electrical panel on your AC unit and look for loose or disconnected wires. Tighten any loose connections.
- Inspect Fuses: Some AC units have fuses in the disconnect box. Check if the fuses are blown and replace them if necessary.
- Examine the Electrical Panel: Look for any signs of damage, such as burnt marks or a burning smell, which could indicate an electrical fault.
Pro Tip: If you're not comfortable inspecting electrical components, it's best to call a professional. Electrical issues can be dangerous if not handled properly.
By checking circuit breakers and inspecting the power supply, you can often resolve electrical issues that affect your AC system. If these steps don't fix the problem, it might be time to call an HVAC technician for a more thorough inspection.
Next, let's discuss how to address refrigerant leaks in your AC system.
4. Refrigerant Leaks
Refrigerant leaks are a common issue that can severely impact your air conditioner's performance. Low refrigerant levels can cause your AC to struggle to cool your home, leading to higher energy bills and potential damage to the system.
Identify Refrigerant Leaks
Detecting refrigerant leaks early is crucial. Here are some signs to watch for:
- Ice Buildup: If you notice ice forming on the refrigerant lines or the evaporator coils, this is a clear sign of low refrigerant. The ice forms because the refrigerant levels are too low to absorb heat, causing the coils to get too cold.
- Decreased Cooling: If your AC is running but not cooling your home effectively, you might have a refrigerant leak. The system can't cool the air properly without enough refrigerant.
- Hissing Sounds: A hissing or bubbling noise coming from your AC unit can indicate a refrigerant leak. This sound is caused by refrigerant escaping from the lines.
Pro Tip: Regularly check your AC unit for these signs, especially during peak usage seasons.
Call a Technician for Low Refrigerant
Handling refrigerant issues is not a DIY task. It's essential to get professional help for several reasons:
- Special Equipment: Detecting and repairing refrigerant leaks require specialized tools and knowledge. Professionals use these tools to locate the exact spot of the leak and ensure the repair is done correctly.
- Safety Concerns: Refrigerant is a hazardous substance. A trained HVAC technician knows how to handle it safely, preventing any health risks or environmental damage.
- System Recharge: After fixing the leak, a technician will recharge your system with the correct amount of refrigerant, restoring its cooling efficiency. Incorrect levels can cause further issues, so it's best left to the experts.
Pro Tip: If you suspect a refrigerant leak, contact a professional immediately. Delaying repairs can lead to more significant problems, including compressor failure, which is costly to fix.
By identifying refrigerant leaks early and getting professional help, you can maintain your AC's efficiency and prolong its lifespan.
Next, let's discuss the importance of maintaining your outdoor AC unit.
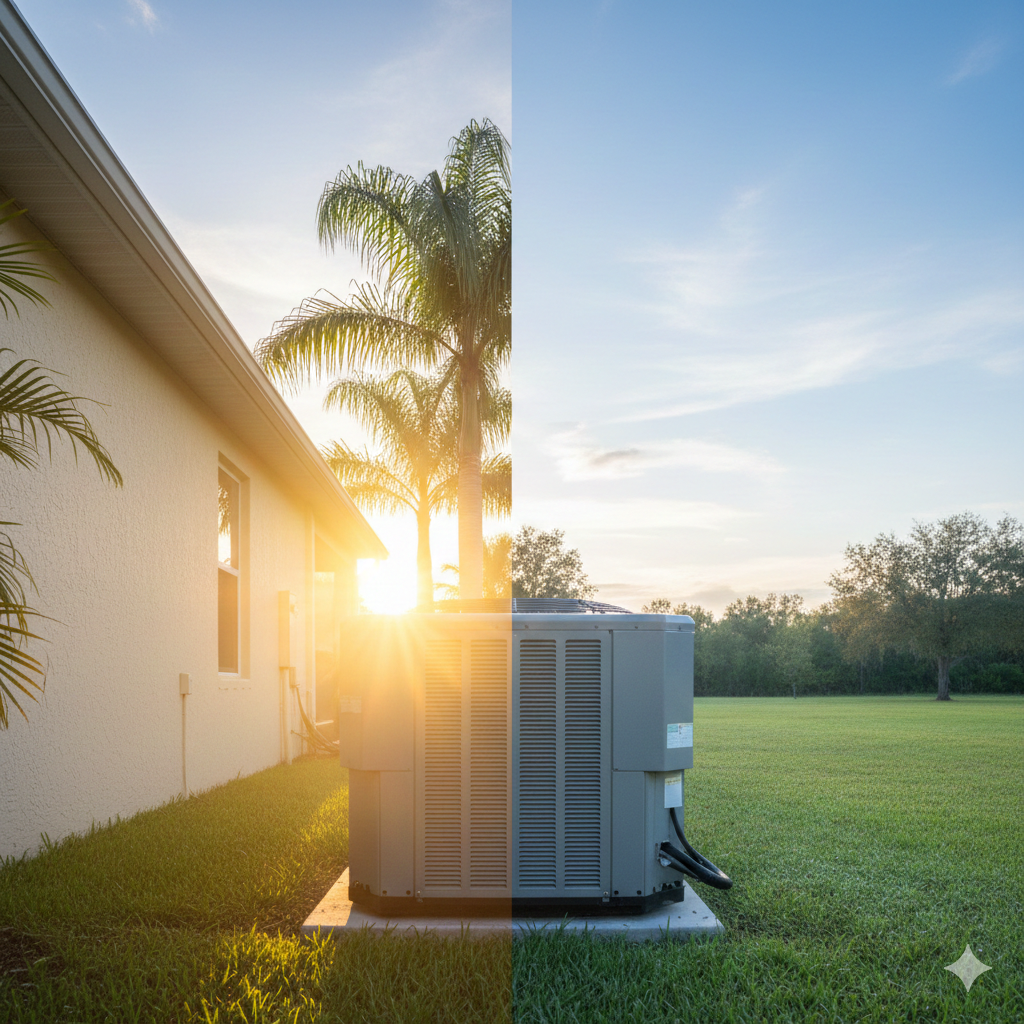
5. Outdoor Unit Maintenance
Keeping your outdoor AC unit in top shape is crucial for efficient cooling. Neglecting this part of your system can lead to higher energy bills and costly repairs. Here are some AC troubleshooting tips to ensure your outdoor unit is well-maintained.
Clean the Outdoor Unit
Debris Buildup: Over time, debris like leaves, dirt, and grass clippings can accumulate around your outdoor unit, causing it to work harder. This reduces its efficiency and can lead to overheating.
Steps to Clean:
- Turn Off the Power: Before you begin, turn off the power to the unit to avoid any accidents.
- Remove Debris: Clear away any visible debris from around the unit. Use a garden hose to gently wash away dirt from the exterior.
- Clean the Coils: The condenser coils can get very dirty. Use a foaming coil cleaner and spray it liberally on the coils. After about 15-20 minutes, rinse off the cleaner with a garden hose, using a gentle spray to avoid bending the fins.
Pro Tip: Make sure to clean your outdoor unit at least once a year, preferably in the spring before the summer heat kicks in.
Inspect for Physical Damage
Unit Inspection: Regularly inspect your outdoor unit for any physical damage. Look for bent fins, loose screws, or any signs of wear and tear.
Steps to Inspect:
- Check the Fins: Use a fin comb to straighten any bent fins. This improves airflow and improves efficiency.
- Inspect the Concrete Pad: Ensure the unit is level and the pad is not cracked. A stable base reduces vibration and wear.
- Look for Leaks: Check for any signs of refrigerant leaks, such as oily spots or hissing sounds. If you find any, call a professional immediately.
Pro Tip: Keep at least two feet of clearance around your outdoor unit. This ensures proper airflow and prevents debris buildup.
By regularly cleaning and inspecting your outdoor unit, you can keep your AC running efficiently and avoid unexpected breakdowns.
Next, let's tackle some frequently asked questions about AC troubleshooting tips.
Frequently Asked Questions about AC Troubleshooting Tips
How do I figure out what's wrong with my air conditioner?
Thermostat Settings: Start by checking your thermostat. Ensure it’s set to "cool" and the temperature is set lower than the current room temperature. Sometimes, a simple adjustment can solve the issue.
Circuit Breakers: If your AC isn’t turning on, check the circuit breaker. A tripped breaker can cut power to your unit. Resetting it might get your AC running again.
Air Filters: A dirty air filter can restrict airflow and cause your AC to malfunction. Replace the filter if it’s clogged. Filters should generally be changed every 1-3 months, depending on usage.
Why is my AC running but not cooling?
Thermostat Issues: Incorrect thermostat settings can cause your AC to run but not cool. Ensure the thermostat is set to "cool" and the fan is on "auto."
Compressor Problems: The compressor is essential for cooling. If it’s malfunctioning, your AC won’t cool the air. This often requires a professional to diagnose and fix.
Evaporator Coils: Frozen evaporator coils can lead to your AC running but not cooling. Turn off the AC to let the coils thaw and check the air filter. If the coils continue to freeze, it’s time to call a technician.
What are common AC issues?
Compressor Wear: Over time, the compressor can wear out, leading to inefficient cooling or complete failure. Regular maintenance can help extend its life.
Fan Controls: Faulty fan controls can cause the fan to stop working, leading to poor airflow and cooling. Listen for unusual noises from the fan, which may indicate a problem.
Electrical Connections: Loose or corroded electrical connections can cause your AC to malfunction. Regularly inspect the electrical components and tighten any loose connections.
By addressing these common issues, you can keep your AC running smoothly and efficiently. If you’re unable to resolve the problem on your own, it’s best to call a professional for help.
Next, let’s discuss the importance of regular maintenance and when to call a professional.
Conclusion
Regular maintenance is crucial for keeping your air conditioner running smoothly and efficiently. By performing routine checks and addressing minor issues early, you can prevent major problems down the line. Here are some key reasons why maintenance is important:
- Improved Efficiency: Regular maintenance, like changing air filters and cleaning coils, ensures your AC runs efficiently, saving you money on energy bills.
- Extended Lifespan: Well-maintained systems last longer, reducing the need for costly replacements.
- Fewer Breakdowns: Catching small issues early can prevent them from becoming bigger, more expensive problems.
However, sometimes DIY troubleshooting isn’t enough. Here are signs it's time to call a professional:
- Persistent Issues: If your AC continues to malfunction despite your efforts, a professional can diagnose and fix the problem.
- Electrical Problems: Issues like tripped breakers or faulty wiring should be handled by an expert to avoid safety hazards.
- Refrigerant Leaks: Low refrigerant levels or leaks require specialized equipment and know-how to repair safely.
At AC's Heating & Air, we specialize in keeping your home comfortable with our expert HVAC services. Whether you need regular maintenance, emergency repairs, or a new installation, our certified technicians have you covered. We serve communities throughout Central Florida, including Apopka, Winter Park, Orlando, and Winter Garden.
For more information on our services or to schedule a maintenance visit, check out our A/C services page. Regular maintenance can help you avoid costly repairs and keep your system running efficiently all year long.
Stay cool and comfortable with AC's Heating & Air!